Beginner’s Guide: How to Lay Solid or Engineered Hardwood Floors
Installing a new hardwood floor can seem daunting, especially if you’re new to home improvement projects. This guide breaks down the essentials of laying both solid and engineered hardwood floors, from preparation and subfloor requirements to step-by-step installation methods. Whether you’re upgrading a single room or your entire home, you’ll learn practical tips for achieving a beautiful, durable result. Get straightforward advice on tools, techniques, and common pitfalls—so you can confidently tackle your flooring project and enjoy a lasting upgrade to your living space.
Understanding Solid and Engineered Hardwood Floors
When considering how to lay hardwood flooring in your home, it’s important to understand the difference between solid and engineered hardwood. Both options offer timeless beauty and durability, but they are constructed differently and suit various environments.
Solid hardwood floors are made from a single piece of wood, giving them a robust structure that can last for generations with proper care. They are well-suited for areas with stable humidity and are available in classic plank, 2-strip, and decorative patterns such as herringbone parquet and HexParket. For example, Junckers offers a range of wood plank flooring options known for their timeless elegance and durability. For those interested in distinctive layouts, herringbone plank flooring and exclusive Hexparket patterns offer a graphic and stylish look.
Engineered hardwood, on the other hand, is crafted from a top layer of hardwood bonded to layers of high-quality plywood or HDF. This construction provides greater stability and makes engineered hardwood more resistant to changes in moisture and temperature. It is an ideal choice for spaces like basements or rooms with underfloor heating. Junckers' engineered floors are designed with the same surface performance and durability as their solid floors. For information on underfloor heating, see the guide on underfloor heating and hardwood floors.
Junckers offers a wide selection of both solid and engineered hardwood floors, including popular species such as oak hardwood flooring, ash hardwood flooring, and beech wood flooring. With options for ultra matt lacquer or nature-inspired oil finishes, you can select a style that highlights the unique grain of the wood and fits your lifestyle.
Essential Tools and Materials You’ll Need
Before you start installing, gather all the tools and materials needed for how to lay hardwood flooring. Having everything ready will help ensure a smooth and efficient process. Here’s what you’ll typically need:
- Tape measure
- Chalk line
- Moisture meter (for subfloor and wood)
- Spacers for expansion gaps
- Flooring nailer or stapler (for solid hardwood)
- Mallet
- Drill and drill bits
- Saw (circular saw, jigsaw, or handsaw)
- Hammer
- Wood glue or adhesive (if using glue-down method)
- Underlayment (for floating or engineered floors)
- Safety equipment (gloves, goggles, knee pads)
- Cleaning supplies (vacuum, broom)
Selecting the correct tools is important for achieving a professional, long-lasting result. For system-specific instructions and materials, refer to the Junckers technical data sheets.
Preparing Your Home for Installation
Proper preparation is the foundation for how to lay hardwood flooring successfully. Follow these steps to get your home ready:
- Acclimate the flooring (if required): For Junckers solid hardwood floors, traditional acclimation is not necessary if indoor conditions are stable and reflect the normal living environment. Keep the flooring in sealed packages until just before installation. Always follow the specific installation instructions provided with your flooring.
- Inspect and prepare the subfloor: Ensure the subfloor is flat, clean, dry, and stable. Remove any existing floor coverings, nails, or debris. Address uneven areas by sanding or leveling as needed. Subfloor moisture content should be measured—see Junckers’ technical guidelines for tolerances.
- Plan the layout: Decide on the direction the boards will run—typically parallel to the longest wall or to the main source of natural light. Mark a straight line as a guide for the first row and consider how doorways, vents, and transitions will be handled.
Ensuring a Healthy Indoor Environment
As you prepare your home, consider the materials you’re bringing inside. Choosing hardwood floors sourced from responsibly managed forests and carrying indoor climate labels supports a healthier indoor atmosphere. Many options from Junckers are FSC® or PEFC certified, ensuring both environmental responsibility and peace of mind for your household. Learn more about Junckers' sustainability principles.
How to Lay Hardwood Flooring Step by Step
Once your space is ready, you can begin the installation. Below is a step-by-step guide on how to lay hardwood flooring for both solid and engineered types.
Laying the First Row
- Start along your reference line, placing the groove side toward the wall.
- Use spacers to leave a consistent expansion gap (about 10–15 mm (3/8–5/8 in) depending on system).
- For solid hardwood, face-nail the first row since a flooring nailer can’t reach the wall. Countersink nails and fill holes with wood putty.
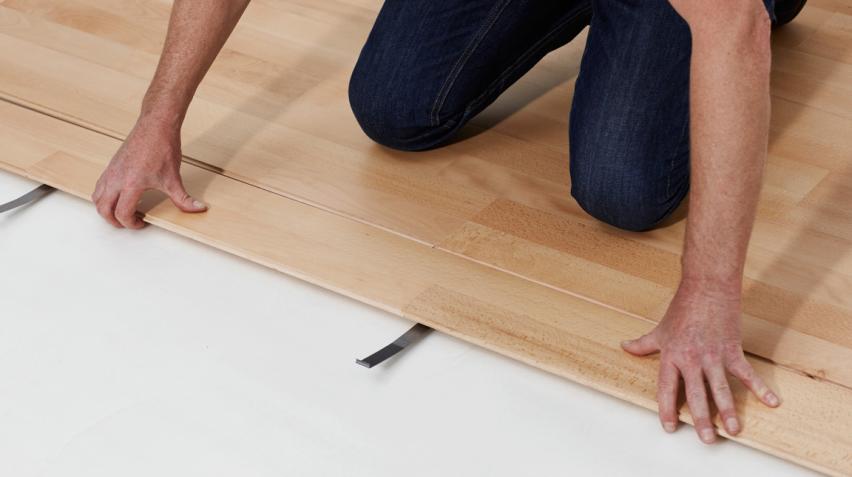
Installing Subsequent Rows
- For solid hardwood, use a flooring nailer to blind-nail through the tongue at a 45-degree angle.
- For engineered hardwood, follow the manufacturer’s instructions—boards may be nailed, glued, or installed with a click system, depending on the product. Junckers' click and glue-down systems are covered in the installation method guides.
- Stagger end joints by at least 500 mm (19 11/16 in) to strengthen the floor and create a natural appearance.
- Tap boards snugly together, checking alignment with each row.
Cutting and Fitting Boards
- Measure and mark boards carefully to fit around vents, corners, and doorways.
- Use a saw to make precise cuts, ensuring boards fit without forcing.
- Dry-fit tricky areas before final installation.
Finishing Touches
- Once the floor is complete, remove spacers and reinstall baseboards or trim to cover the expansion gap.
- Sweep or vacuum the floor to remove dust and debris.
- Inspect the surface for any gaps or loose boards and address them promptly.
Tips to Achieve a Professional Finish
- Mix boards from different boxes to balance color variations and achieve a natural look.
- Maintain a straight line using your chalk guide, adjusting as needed.
- Use the right fasteners and adhesives as recommended for your floor type.
- Take your time measuring and cutting, especially around fixed features.
- Refer to Junckers' technical advice and data sheets for installation references.
Caring for Your New Hardwood Floor
After installation, keeping your hardwood floor in top shape is straightforward. Sweep or vacuum regularly to remove dirt and grit. For lacquered floors, see cleaning tips for lacquered wood floors to maintain a clean, scratch-free surface. To extend your floor’s lifespan, get practical advice from the maintenance guide for lacquered wood floors. Consider using a dedicated floor cleaner for wooden surfaces. Place felt pads under furniture and avoid excessive moisture, which can damage the wood. With simple maintenance, your floor will retain its beauty for years to come.
Need Guidance on Your Flooring Project?
If you have questions about how to lay hardwood flooring or need expert advice on choosing the right style and finish for your home, Junckers is here to help. Contact our team for tailored recommendations, guidance on installation methods, or to browse our full range of solid and engineered hardwood flooring options. Let us help you create a beautiful, durable floor that fits your lifestyle.