Glue Down Hardwood Floors: Installation Process, Prep, and Best Practices
Installing hardwood floors using the glue down method requires careful preparation and attention to detail to ensure a durable, lasting result. This guide outlines every step of the process—from assessing and preparing your subfloor to selecting the right adhesive and laying each plank efficiently. You'll find practical tips for achieving a smooth, secure installation, as well as essential best practices that help prevent common issues like moisture damage or uneven surfaces. Whether you’re a homeowner looking to upgrade your space or a professional aiming for the highest standards, this overview provides the reliable information needed for a successful glue down hardwood floor project.
What Is the Glue Down Method for Hardwood Floors?
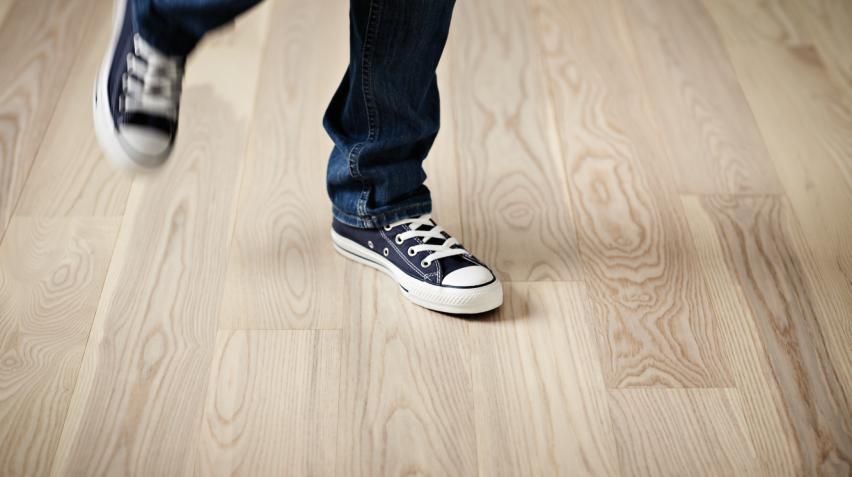
The glue down method is a popular and reliable technique for installing hardwood floors in private homes. With this approach, each plank of solid hardwood is affixed directly to the subfloor using a specialist adhesive. This creates a secure and seamless surface that is both stable and long-lasting, making it ideal for living rooms, bedrooms, hallways, and even kitchens. Homeowners frequently choose the glue down method for its ability to reduce noise, prevent movement, and deliver a beautiful, permanent finish. This installation style is fully compatible with underfloor heating, allowing for both comfort and visual appeal in any room. For more on compatibility, see the guide to underfloor heating for solid hardwood floors.
Key Benefits of Laying Hardwood Floors with Glue
When it comes to laying hardwood floors with glue, several advantages stand out:
- Increased stability: The adhesive bonds the planks directly to the subfloor, minimizing movement and reducing the risk of squeaks or gaps over time.
- Sound reduction: The glue down method helps dampen sound, resulting in quieter, more comfortable living spaces.
- Versatility: Suitable for a variety of subfloor types, including concrete and plywood, this installation approach adapts to different home environments.
- Longevity: Properly installed glue down hardwood floors are designed to endure daily wear and last for generations.
- Aesthetic flexibility: This method supports a wide range of plank sizes and patterns, from classic planks to decorative options like herringbone and HexParket, allowing homeowners to achieve a personalized look. Explore a wide selection of options in the solid hardwood flooring collection.
Preparation Steps Before You Install Glue Down Hardwood Floors
Proper preparation is essential to ensure a successful installation and lasting result. Here’s how to get ready:
- Subfloor assessment: Begin by checking that your subfloor is clean, dry, and level. Remove all dust, debris, and contaminants. If necessary, repair any damaged areas to prevent unevenness.
- Moisture control: Ensure the subfloor’s moisture content is within the recommended range. For wood subfloors, moisture should not exceed 12%, and the difference between subfloor and hardwood should be less than 4%.
- Acclimation: Allow your solid hardwood planks to acclimate to the room temperature and humidity for several days before installation. This helps prevent expansion or contraction after the floor is laid.
- Underfloor heating compatibility: If your home has underfloor heating, verify that both the hardwood and adhesive are suitable for this application. Find details about glued floors with underfloor heating in residential settings.
- Gathering tools and materials: Prepare all necessary tools, including a tape measure, notched trowel, spacers, rubber mallet, and recommended adhesives. For a comprehensive list, see the technical sheet for materials for glued floors.
How to Install Glue Down Hardwood Floors: Step-by-Step Guide
Follow these steps for a smooth and effective installation:
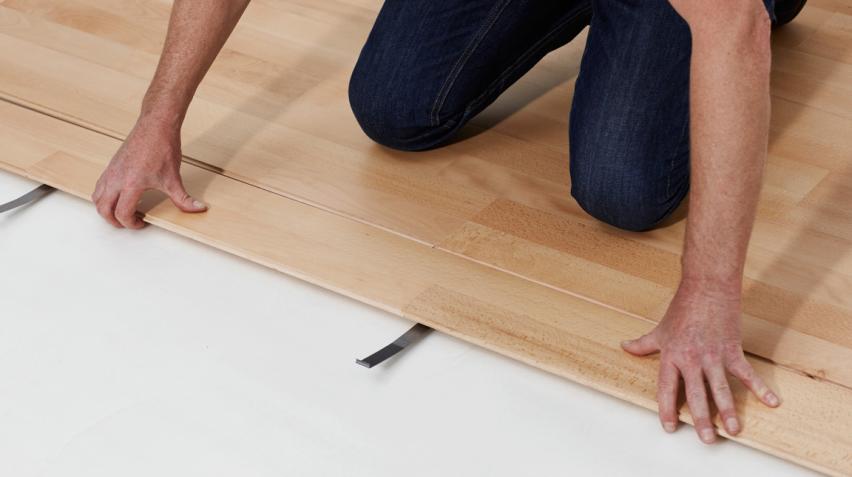
- Plan your layout: Mark a straight starting line using a chalk line to ensure your first row is perfectly aligned. Dry-fit the first few rows to check the arrangement and fit.
- Apply adhesive: Working in small, manageable sections, spread adhesive evenly with a notched trowel. Avoid covering too large an area to prevent the glue from drying out.
- Lay the first rows: Place the initial planks along the starting line, using spacers to maintain a 10–15 mm expansion gap around the perimeter. Connect the tongue and groove edges for a secure fit.
- Continue installation: Proceed row by row, staggering end joints for a natural look and added strength. Use a tapping block and rubber mallet to ensure tight connections. Cut planks as needed for edges and around obstacles.
- Finishing touches: Once all planks are installed, remove the spacers and fit transition strips and moldings.
For further technical details and professional recommendations, refer to Junckers’ glued hardwood floors installation instructions.
Tips for a Smooth Installation
- Work in sections to keep adhesive fresh and manageable.
- Clean any adhesive spills from the plank surfaces immediately to prevent staining.
- Use chalk lines to keep rows straight and organized.
- Double-check expansion gaps to allow for natural wood movement.
- Follow Junckers’ installation guides for the best results with their solid hardwood products.
Aftercare and Maintaining Your New Hardwood Floor
Proper aftercare ensures your new floor remains beautiful and durable for years:
- Curing time: Avoid heavy traffic and placing furniture on the newly installed floor for at least 24 hours to allow the adhesive to fully cure.
- Routine cleaning: Regularly sweep or vacuum to remove dust and grit. Use a damp (not wet) mop and suitable wood floor cleaner when necessary.
- Preventative measures: Place mats at entrances, use felt pads under furniture, and maintain a stable indoor climate.
- Maintenance products: Junckers provides a range of care and maintenance products specifically designed for solid hardwood floors. For detailed guidance, visit the section on how to clean and maintain your hardwood floor.
Why Choose Junckers for Your Solid Hardwood Flooring Project
Junckers offers a broad selection of solid hardwood floors, including classic plank, 2-strip, herringbone, and HexParket designs. With wood sourced from responsibly managed forests and many products carrying indoor climate labels, Junckers floors are both environmentally responsible and built for long-term performance. All floors are factory-finished and ready for use, making installation smooth and convenient. For expert support and a range of styles to suit every home, explore the solid hardwood flooring collection.
Get Help and Inspiration for Your Flooring Project
For further guidance and inspiration, browse Junckers’ project galleries and technical resources. Whether you’re looking for design ideas or need step-by-step installation advice, Junckers offers comprehensive support at every stage of your flooring project. For information on cleaning, maintenance, and professional guidance, visit how to clean and maintain your hardwood floor.
Frequently Asked Questions About Laying Hardwood Floors with Glue
Can I install glue down hardwood floors myself, or should I hire a professional? add
While confident DIYers can undertake this project, professional installation is recommended for the best long-term results, especially in larger areas or with patterned floors.
Is this method suitable for kitchens or bathrooms? add
Glue down hardwood floors are suitable for kitchens, but extra care with moisture control is advised. For bathrooms or areas with high humidity, consult Junckers for tailored recommendations.
How do I choose the right adhesive? add
Always use an adhesive recommended by the flooring manufacturer. Junckers provides guidance on compatible products for their solid hardwood floors—see the technical sheet for materials for glued floors for more information.
What if my subfloor isn’t perfect? add
Address any issues with flatness, dryness, or damage before starting. A well-prepared subfloor is essential for a lasting installation. For complex situations, consult the official installation instructions for glued hardwood floors.
Need more help? Reach out to Junckers’ team for personalized advice.