Hardwood Floor Sanding: Everything You Need to Know
Sanding a hardwood floor is a crucial process that restores its original beauty and extends its lifespan. Whether you’re dealing with surface scratches, discoloration, or general wear, proper sanding prepares your floor for a new finish and lasting durability. In this guide, you’ll find clear, step-by-step instructions on how to approach hardwood floor sanding—from preparation and equipment selection to detailed sanding techniques and choosing the right surface treatment. Learn what to consider at each stage to achieve a smooth, resilient result that meets both aesthetic and technical standards.
Why Hardwood Floor Sanding Is Important for Lasting Beauty and Durability
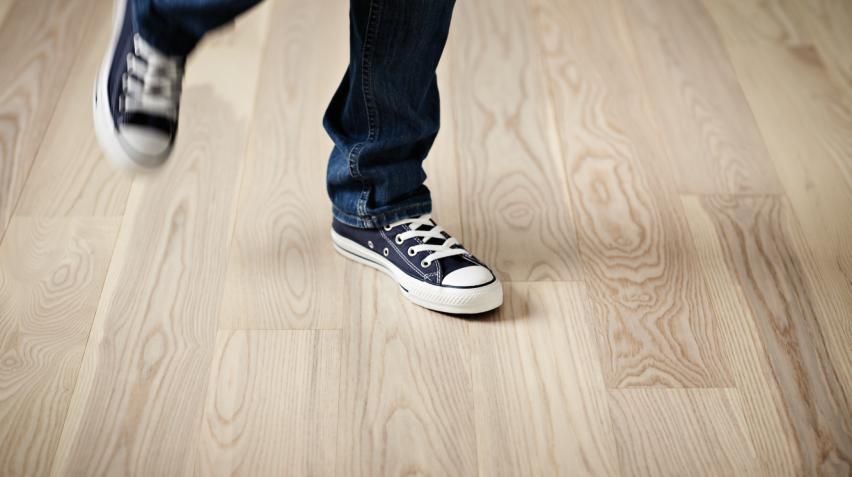
Hardwood floor sanding is a vital process for anyone who wants their solid wood floors to look great and last for many years. Over time, even the most well-maintained hardwood floors can develop surface scratches, stains, or dullness from everyday use. Sanding removes the worn surface layer, revealing the fresh wood beneath and allowing for a new finish to be applied. This not only refreshes the appearance of your floors—bringing out the natural character of oak, ash, or beech—but also helps protect against future wear. Regular sanding, when needed, can extend the lifespan of your investment and maintain the comfort and visual appeal of your home.
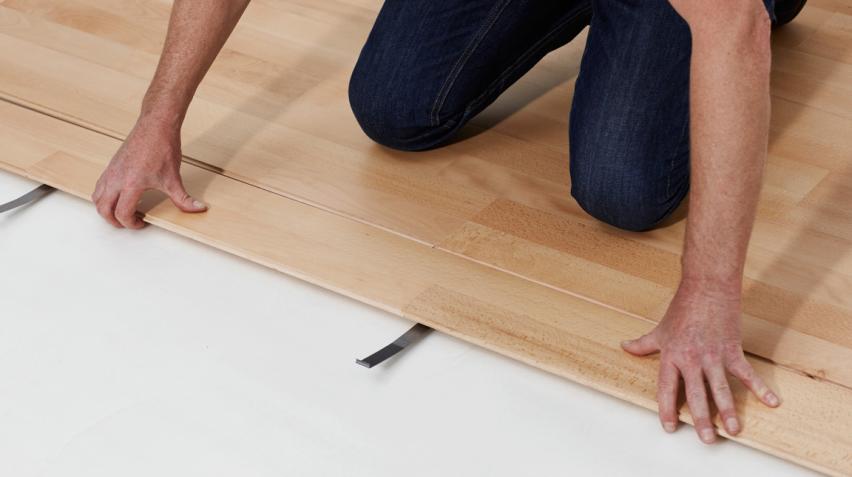
Tools and Materials Needed for Sanding Solid Wood Floors
Achieving professional results in hardwood floor sanding requires the right set of tools and materials. Before you begin, gather the following:
- Drum sander or belt sander for large surface areas
- Edge sander for corners and edges
- Sandpaper in various grit levels (start coarse, finish fine; typically 36, 60, 80, 100, 120-grit)
- Industrial vacuum or dust extractor
- Dust masks and hearing protection
- Wood filler for repairing small cracks or holes
- Soft cloths or microfiber mops for cleaning
- Suitable surface treatment products (oil, ultra matt lacquer, soap)
Choosing high-quality sandpaper and reliable machinery helps ensure a smooth, even finish—essential for Junckers’ solid wood floors, which are designed for both beauty and durability.
Preparing Your Home for Hardwood Floor Sanding
Taking the time to properly prepare your home makes the sanding process more efficient and protects your surroundings. Here’s how to get ready:
- Remove all furniture, rugs, and decorative items from the room
- Clean the floor thoroughly to eliminate dust and debris
- Check for and remove any protruding nails or staples
- Ensure proper ventilation by opening windows or using fans
- Cover doorways, vents, and adjacent surfaces with plastic sheeting to contain dust
- Make sure pets and children are kept away from the work area
These steps lay the foundation for a streamlined sanding process with minimal disruption to your home.
Step-by-Step Guide to the Sanding Process
Successful hardwood floor sanding is about careful sequencing and attention to detail. Follow this process:
Assess the Floor and Select the Starting Grit
Begin by examining your floor’s condition. For heavily worn or previously finished floors, start with a coarse grit (like 36-grit). For surfaces in better condition, a finer initial grit may suffice.
Sanding in Stages
- Use the drum or belt sander to sand the main surface
- Work methodically, moving with the wood grain
- Progress through sandpaper grits: coarse to medium to fine (36 → 60 → 80 → 100/120)
- After each pass, vacuum thoroughly to remove dust
Edge and Corner Sanding
Employ an edge sander to reach areas near walls and in corners. Use the same grit sequence as the main floor to maintain consistency across the entire surface.
Cleaning Between Each Pass
After every sanding stage, vacuum and wipe down the floor with a damp cloth. This prevents dust from interfering with the next step and ensures a smooth, even result.
Repairing Cracks and Holes
Fill any minor cracks or holes with a suitable wood filler, ideally using dust from your sanding mixed with filler to match the color. Allow to dry before continuing. See Junckers' WB Filler for optimal results.
Final Fine Sanding
Finish with the finest grit for a perfectly smooth surface. Take extra care with corners and transition areas.
Choosing the Right Surface Treatment After Sanding
Once sanding is complete, the next step is applying the correct surface treatment. The choice depends on the type of wood, the look you want, and your household’s needs. Common options include:
- Oil: Enhances the natural grain and creates a warm, inviting look. Easy to maintain and repair. See how to clean oiled wood floors and maintain oiled wood floors.
- Ultra matt lacquer: Offers strong protection while preserving the wood’s natural appearance and feel. For maintenance guidance, visit cleaning lacquered wood floors and maintenance of lacquered wood floors.
- Soap: Popular for a soft, raw finish but requires more maintenance. Guidance for cleaning soap-treated hardwood floors ensures your floor stays in optimal condition.
For Junckers floors, all treatments are factory-finished for evenness, but re-finishing after sanding allows you to refresh or change the look. Always follow the manufacturer’s recommendations, especially regarding drying times and application methods.
Common Mistakes to Avoid During Hardwood Floor Sanding
Hardwood floor sanding can yield excellent results, but certain mistakes can compromise the finish:
- Skipping sanding stages or grits, leading to visible scratches
- Failing to vacuum thoroughly between passes
- Over-sanding in one area, creating uneven surfaces
- Using the wrong surface treatment for your wood species
- Neglecting safety equipment, such as dust masks and ear protection
By avoiding these pitfalls, you help ensure a smooth, resilient, and visually appealing finish.
Maintaining Your Newly Sanded Hardwood Floor
Proper maintenance is essential for keeping your sanded and refinished floor looking its best:
- Clean regularly using a microfiber mop or soft brush
- Use only recommended cleaning products for hardwood, such as Junckers Floor Cleaner
- Wipe up spills promptly to prevent stains
- Consider periodic surface re-treatment to maintain protection
- Avoid harsh chemicals or excessive water exposure
Junckers offers a range of care products specially developed for solid wood floors, making ongoing maintenance straightforward and effective. If you want more in-depth maintenance and cleaning guidance, consult Junckers' guide on how to clean and maintain your hardwood floor.
Sustainable Practices and Certifications in Floor Sanding
Sustainability is at the core of Junckers’ approach. All hardwood used is sourced from responsibly managed FSC® or PEFC-certified forests, supporting long-term environmental balance. Many Junckers products meet strict indoor climate requirements, ensuring a healthy home environment. During sanding and refinishing, prioritize dust containment and responsible disposal of waste. Choosing certified products and sustainable methods benefits both your home and the environment. For more on Junckers’ sustainability approach, visit our sustainability page.
When to Call a Professional Floor Finisher
While many homeowners are comfortable tackling minor sanding projects, there are times when it’s best to consult a professional:
- Large areas or intricate patterns such as herringbone plank flooring or HexParket
- Deep damage or extensive repairs required
- Specialty finishes or unique wood species
- High-value or historic floors
A skilled floor finisher brings technical knowledge, ensures consistency, and delivers results that meet the highest standards for both look and longevity.
Get Guidance and Support from Junckers
Whether you’re planning a full sanding and refinishing project or simply looking for expert advice, Junckers is here to help. Visit our guides on solid wood flooring care, explore our range of certified surface treatments, or contact our technical support team for tailored recommendations. For more information on keeping your hardwood floors beautiful for generations, reach out to Junckers today or get familiar with our guidance section.